Choosing the Right Materials
Understanding Resin Types
When I first got into resin candle making, I was blown away by the different types of resin available. You’ve got epoxy resin, polyester resin, and even bio-resin. Each type has its own qualities, and the choice truly depends on what you’re aiming for. Epoxy resin, for example, is super durable and great for beginners, while polyester resin can give you a bit more flexibility with finishes.
It’s essential to do your homework. Some resins are better for colorants, while others are preferred for their clarity. I remember mixing up brands and wishing I’d done a bit more research beforehand, so learn from my past missteps!
And let’s not forget about the safety gear! You gotta think about gloves, masks, and well-ventilated spaces. Trust me; the last thing you want is to be stuck with a headache from fumes while trying to figure out whether your mix is right.
Wax and Fragrance Selection
Here’s the thing: choosing wax can drastically change the outcome of your candle. I usually go for soy wax because it’s eco-friendly and burns clean, but paraffin wax can be easier to work with for certain projects. Experiment a little! You might find a blend that’s perfect for your style.
And oh, fragrance oils! Choosing the right scent is essential. I often spend way too long in the store smelling candles, but hey, a good scent can really elevate the whole experience. Try to find oils that are skin-safe if you plan to use your candles for more than just decoration.
Make sure to test your fragrances! A scent might smell divine in the bottle but completely fades once the candle’s lit. I’ve had my fair share of surprises there, and it’s always best to test burn beforehand.
Colorants and Molds
The color of your candles is just as important as their scent. I enjoy using liquid dyes for resin, but you can also experiment with mica powders for a nice shimmer. Don’t be shy to get creative! You can mix and match until you find that perfect hue.
As for molds, I’ve tried everything from silicone molds to plastic containers and even natural elements like shells. The possibilities are endless! Just be mindful of how the resin reacts with different materials.
And, my friends, always make sure to prepare your molds properly. I learned the hard way that not using a release agent can make demolding a nightmare. I ended up ruining quite a few pieces because of that little oversight. Avoid that trap!
Mastering Mixing Techniques
Proper Mixing Ratios
This part can make or break your project! If you’re not mixing resin properly, your candle might not cure right or could end up sticky. Generally, there’s a ratio on the resin instructions that you should carefully follow. Don’t try to wing it; trust the numbers!
I know this sounds like a chore, but weigh your ingredients using a scale for precision. I’ve tried measuring by volume, thinking it would be faster, and it led to some major oops moments. Don’t be like me; just stick to what works!
And remember to mix slowly to avoid bubbles! It’s tempting to just whip it up quickly, but fostering patience pays off—trust me!
Incorporating Additives
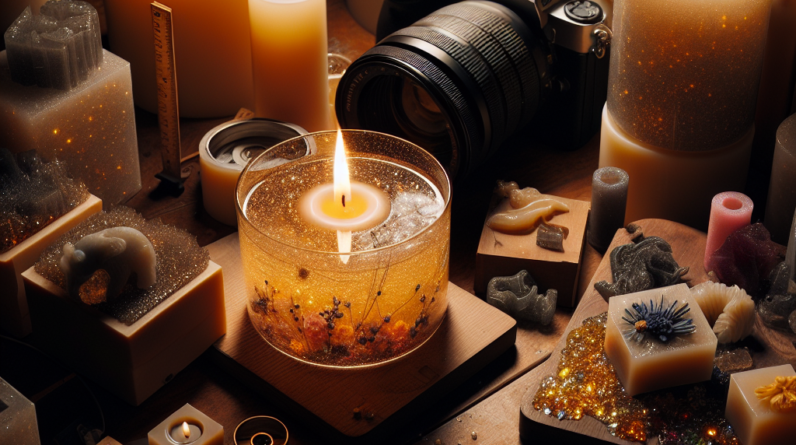
Once you’ve nailed the basics of mixing, you can start adding in extras! Glitter, dried flowers, or even crystals can make your candles unique. I love throwing in a little sparkle, as it can elevate the overall look of what you’re creating.
However, an important tip is to know how each additive affects the curing process. Some flowers might absorb moisture and ruin your candle, while others might work perfectly. A little trial and error is essential here; it’s all part of the learning journey!
Also, be cautious about the quantity of additives. Too much might affect how the candle burns. I always start small and gradually add more until I attain that sweet spot of aesthetics versus functionality.
Polishing Your Technique
Now that you’ve got your mixture sorted, it’s time to pour like a pro! This is where practice makes perfect. Try pouring from a height—this can help minimize bubbles and creates a smoother surface. It takes a bit of practice, but you’ll get the hang of it!
And please—give your candles enough time to cure. Rushing this step can lead to cracking or even worse problems. I like to set my timer and stay away from the area until they’re ready. Out of sight, out of mind, right?
Lastly, don’t forget about the finishing touches! Trimming wicks and checking for air pockets can elevate your final product. I often end up fine-tuning these little details after an initial pour, so take the time to do it right!
Demystifying the Curing Process
Understanding Cure Time
Curing might sound like a fancy term, but it’s pretty straightforward. Understanding the necessary time required for your resin to set properly can save you a ton of frustration. Epoxy resin usually takes about 24 hours to cure, but it can vary depending on environmental factors like temperature and humidity.
From my own experience, I’ve learned that patience is key! I’ve tried jumping the gun and uncovering my candles too early, and it ended up ruining a few. Allow your candles the full cure time; you won’t regret it.
Also, consider keeping your curing candles in a warm, dust-free environment. Once, I left some in my garage, and let’s just say they didn’t turn out too pretty. Trust me; ambiance matters!
Testing for Quality
After the required time has passed, it’s crucial to test the candles. Start with a burn test to see how well they perform. Take notes on the scent throw, how long they burn, and if there are any issues with tunneling.
It’s a vital step to ensure your ultimate goal of perfection. I always remind myself: if I wouldn’t buy it, I won’t sell it. Quality over quantity, am I right?
This testing phase can feel tedious, but it’s where you spot the flaws before they reach your customers. Don’t skip out—it’s worth every moment!
Storage and Packaging
The way you store your candles matters just as much as how you make them! I’ve come to find that keeping them away from direct sunlight will help prevent fading and issues. A cool, dry place works wonders.
When it comes to packaging, think about your brand! I love getting creative. Whether you’re using simple boxes or clear bags, the goal is to protect your candles while showcasing them. I’ve had success with pretty labels that help convey what I’m all about!
And let’s not forget about customer experience! I’ve found that a well-packaged candle small touches, like a thank you note or care instructions, can make a difference. It can help bring your vision to life from the moment it’s unwrapped!
Marketing Your Resin Candles
Building Your Brand Presence
Now, let’s chat about the fun part—getting your candles out there! I started with social media. Platforms like Instagram and Pinterest are fantastic for showcasing your creations. Trust me, pretty visuals grab attention quickly!
Make sure to highlight the unique aspects of your candles in your captions and stories. I’ve found that sharing behind-the-scenes moments helps customers connect with my journey, which draws them in even more.
This isn’t just about selling; it’s about building relationships. The more personal you are, the more likely they are to support your craft!
Setting the Right Price
I remember my initial struggle with this one! Pricing can be tricky. It’s vital to consider your materials, time spent, and even market trends to set the right price for your product. Start with a cost analysis and then adjust based on your brand positioning.
Don’t undersell your hard work! I learned the hard way when I sold some candles just to get rid of stock, only to realize I was completely undervaluing my efforts.
Don’t be afraid to revisit your prices regularly as you gain experience and quality improves. It’s an evolving journey, and so should your pricing strategy!
Leveraging Online Marketplaces
Finally, I can’t stress enough how powerful online platforms can be for selling your creations. I’ve found success with Etsy and even local Facebook groups. Each has its own vibe, so explore multiple avenues and see where you fit best!
Crafting engaging product descriptions and using SEO tips can take your listings to the next level. Once I revamped my descriptions, I noticed a spike in interest. So, don’t just write the basics—sell your story!
And, of course, customer reviews matter! The more positive feedback you can rack up, the better. Every step you take in promoting and improving your brand pays off in the end!
FAQs
What materials do I need to start making resin candles?
You’ll need resin (of your choice), wax, fragrance oils, colorants, molds, and safety gear like gloves and a mask.
How long does it take for resin candles to cure?
Typically, epoxy resin takes about 24 hours to cure fully, but environmental factors can affect this timing.
Can I reuse candle molds?
Yes! Many silicone molds can be reused several times. Just ensure they are clean and free of any residue each time you use them.
How should I store my completed candles?
Keep them in a cool, dry place away from direct sunlight to prevent fading and damage.
What’s the best way to market my resin candles?
Utilize social media, build your brand presence through storytelling, and leverage online marketplaces for maximum visibility.
Related Content
- Addressing the Challenges of Shipping Resin Candles
- The Power of Stone and Resin: How These Candles Create a Tranquil Environment
- Why Everyone’s Talking About Resin Candles This Year
- A Designer’s Guide to Resin Candles: What Makes Them So Captivating?
- From Craft to Elegance: The Story Behind Handcrafted Resin Candles


